
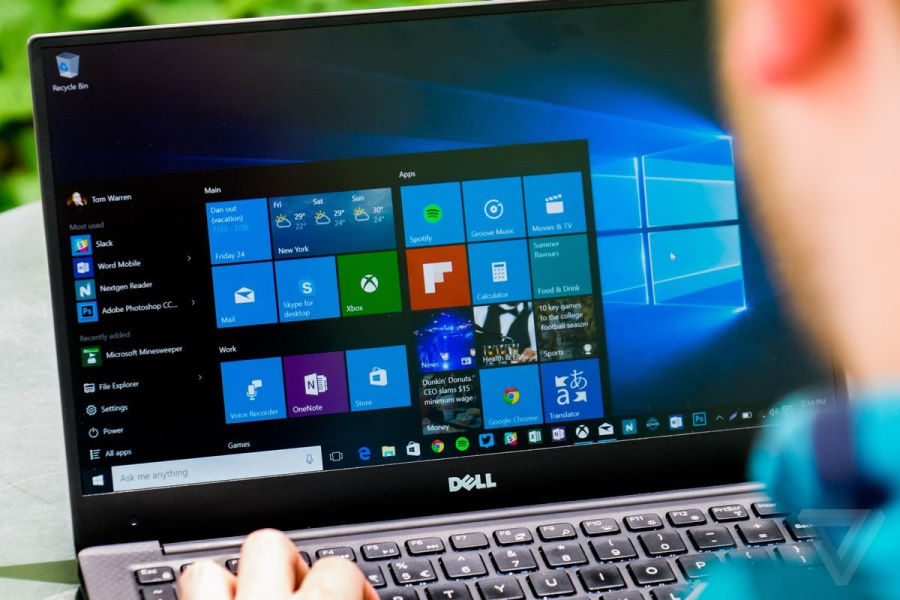
Installing Windows 10 may be required if you bought a laptop without a preinstalled operating system. Also, you may need to reinstall Windows 10 in case of problems with the OS. In any case, you need to know how to install Windows 10 yourself, so as not to overpay the computer masters. In fact, installing Windows 10 is a very easy process. The main thing is to understand the main points.
Before you start looking at the most complete guide to installing Windows 10 on a computer and apply the knowledge gained in practice – take a USB flash drive with at least 8 GB of memory in your hands. When the flash drive is in your hands, you can start installing the distribution kit.
Our team tried to write the most complete instructions for installing Windows 10. But if you have any questions, you can always ask them in the comments!
Installing windows 10 – preparation stage
The flash drive is the main tool with which the operating system will be installed. The first step is to prepare the USB stick. There is no difference whether the flash drive will be 3.0 or 2.0, and this will not affect anything else except the write / install speed. The next stage is the presence of an image from which you will need to write the system to the drive. The image, or as it is also called, the installation files of the Windows 10 system can be found on various Internet resources. Most often, Windows images that “walk on the Internet” are supplemented with various modifications. Such images can limit the functionality of Windows 10 or are crammed with software that does not bring anything good to the end user.
The danger of installing pirated Windows was and will be. If you have no experience of interacting with them and you do not want to become an “accidental victim” of cybercriminals, it is recommended to install a legal version of the OS.
But you can find a clean, legal or original Windows 10 “without modifications” and write it to a USB flash drive in this way:
- Insert the flash drive into the USB port of the computer (it will be displayed in the system with a characteristic sound and can be seen through the explorer).
- Open any browser (Edge, Mozilla, Google and others). The computer or laptop from which you enter the browser must be connected to the Internet.
- In any address bar / search engine in Russian, write “Download Windows 10”.

- The only place that has a clean, legal image is at microsoft.com. You can download the Windows 10 installation right here. No other sites will give the desired result, but the search engine algorithm will give it, and you will receive a link to the desired page.
- Then press the button “Download the tool now”.
- And you download MediaCreationTool.
- The browser is no longer needed, you can close it. Next, run the tool as administrator. The next stage is the preparation of the flash drive itself. If the flash drive is 3.0, then the preparation time on an average computer takes about 15 minutes.
- Accept the license agreement after reviewing its contents.

- Wait a while until the program offers you several options.
- If you have Windows 10, 7 or 8 on this PC, the first item allows you to update your OS to the latest current version. To create an installation USB drive, select Create Installation Media. Choose the second item and click “Next”.
- Uncheck the “use recommended settings” checkbox. And if required, choose your language, bit depth (if in doubt, or make a USB flash drive universal, put “both” in the bit width field). But remember that 32-bit Windows is needed only for some ancient devices with less than 4 GB of RAM. That is, always install 64-bit Windows 10.
- Next, you have a choice between an ISO file or a USB device. If you don’t want to make a bootable USB flash drive now, but you need a system image, choose the ISO file. This will save the image in ISO format to your PC’s hard drive so you can use it in the future for recording without having to go back to the Internet.
- To write the system to a USB flash drive, you need to select “USB device”.
- You need to be careful here. If several drives or flash drives are connected to the computer, you should choose the correct one, because before recording, the program will completely format the flash drive into the FAT32 file system necessary for operation.
- You can make sure that the desired drive is under the same letter, you can use the explorer.

- Next comes a long procedure for creating the media itself, divided into two stages. The first step is downloading the image. The second stage is installing the distribution kit on a USB flash drive.
- After complete installation, the files will be on the media, and the data carrier itself can be used to install Windows 10 from a USB flash drive to a laptop or PC.


In addition to the official program Media Creation Tools, you can use other popular utilities for recording the system image to a USB flash drive:
- Ultra ISO;
- Rufus;
- WinToFlash;
- Universal USB Installer.
You can even use the command line to write the Windows 10 distribution to a USB flash drive.
But the easiest way to understand and implement is the way to work with the official Media Creation Tools, so stick with it.
Installing Windows 10: Different Ways to Install
In general, installing Windows 10 from a USB flash drive comes down to one thing – you run the system installation file and use the installation wizard to install Windows on your computer. But, there are differences in how and in what “environment” you can run the installer. The next method should be chosen based on the needs of what the computer provides you.
Clean install of Windows 10
The mistake of many newbies is that to install the system, they turn on the computer, wait for Windows to load (which needs to be reinstalled) and try to start the installation from the flash drive. It is not advisable to do this, since this method will more often lead to a failed installation of the system.
For a complete and high-quality installation of the OS, it is recommended to do a clean installation of Windows 10. “clean” means the installation of the operating system on a drive prepared and formatted for this task.
The drive can be a hard drive, an SSD, or a dedicated “area” of a drive that you can create from a drive before or during a clean install. Installation sequence:
- Connect the USB flash drive with the distribution kit to the computer prepared for reinstalling Windows.
- Choose to launch the flash drive through a different boot environment (Boot menu, UEFI, BIOS).
- Select the correct installation options and format the hard drive for subsequent installation on it.
- Run the installation and wait for it to complete.
Operating system boot environment BIOS and UEFI
Below is a list of interfaces from which to download the OS installer. The easiest way to work is through the Boot menu.
Installing Windows 10 via UEFI
As soon as you turn on the computer, the motherboard emits a short signal, and information about the manufacturer of the motherboard, PC or laptop appears on the screen, with the help of a certain key you can enter the UEFI interface.
All modern motherboards contain this interface by default. And thanks to him, you can download the installation distribution from a USB flash drive. Installing Windows 10 via UEFI starts like this:
- In the turned off computer, insert the installation USB flash drive with Windows 10 into the USB port.
- Press the Power button to turn on the PC.
- As soon as you heard a squeak and saw the motherboard splash screen, press the Del key on the computer (press continuously until UEFI opens). You can also log in using the F2 or F1 keys. On laptops, this is also F1 and F2. HP notebook PCs enable UEFI with the F10 key.
- In the UEFI interface that opens, find the advanced menu (Advanced mode). Depending on the interface, it can be placed at the bottom or top of the screen. Also, the extended menu can be called with the F7 key.
- Working with an ASUS motherboard, press F7 – go to the “Boot” section – in the Boot Option # 1 line, select USB Flash.

- If your PC has an MSI motherboard – press F7 – Setting – Boot – select “Boot option” from below – set USB: Key “name of the connected flash drive”.

- Booting from AsRock is easier – click on the “Boot” tab and set the Windows flash drive to “Boot Method # 1”.

- For Gigabyte – go to the “Setting” section and click “Boot Option # 1” on your flash drive.

If the Boot Option offers a choice between “name of the stick” and “UEFI: name of the stick”, always choose UEFI. After changing the boot priorities, press F10 and select “Save and Exit”. The download will go from the storage medium you specified.
Installing Windows 10 via BIOS
If your PC motherboard works with BIOS, this means that you are installing Windows 10 through the BIOS. In this case, you can encounter various difficulties both with operation and during the installation process.
It should be understood that only the keyboard works in the BIOS, and all manipulations are carried out through it. Remember:
- Movement – arrows up, down, left, right;
- Apply / Expand – Enter;
- Cancel / go back – Esc;
- Save parameters and exit – F10.
There are various types of BIOS such as Award, AMI, and Phenix-Award.
Due to minor changes in the interface, there is a difference in setting download priorities, but using the AMI example, it is easy to figure out where the required parameter is located:
- Connect the USB flash drive and start the PC.
- After a short sound, press the button to enter the BIOS (computers – Del, laptops – F2, F12, Fn + F2, etc.).
- Go to the “Advanced” – “USB Configuration” section.

- In this section, next to the “USB Function” and “USB 2.0 Controller” parameters, check that “Enabled” is selected.

- Use Esc to go back and go to the “Boot” – “Hard Disk Drives” tab.

- Put your USB flash drive as the first in the list of loading media.

- Install boot from HDD to the second location.

- Then press F10 to save the changes and click “OK”.

- The system will offer to reboot the system while saving the specified parameters. Click OK. The reboot will start automatically. You don’t need to touch anything. We are waiting for the download from the USB flash drive to occur.


Boot-menu
We repeat almost everything that we did when loading UEFI, with a difference in the keys pressed:
- Plug in your USB flash drive and start your computer.
- As soon as the logo of the motherboard appears, press the keys to call the Boot menu. They are different for each motherboard. If your motherboard is from Asus, press F8, F11-F12 if MSI, Gigabyte motherboards are installed, and F9 if Asrock.
- If Windows 8 or 10 is currently installed on the computer, then select the USB flash drive as the bootloader with the inscription “UEFI: USB flash drive name”.

Windows 10 setup wizard
Installation of Windows 10 takes place in several stages: preparation for installation, installation, settings after installation. Thanks to the installation wizard, it’s easy:
- Loading data from a USB flash drive starts a window where you select the language, time format and input method.

- If everything suits you, click “Next” and then “Install”.

- The OS offers to go through activation now. If there is no key, click “I do not have a key.” You can activate Windows 10 later, or even use it without a digital license.
- Next, select the OS you want to install. The “Home” version is sufficient for standard work on a computer. The Pro version is installed because of the additional functions for configuring Windows required in the IT field. Education is an OS focused on learning and students.
- Then read the license terms and accept them.
- To start a new installation of Windows 10, click “Custom”.
- Here you need to choose which drive Windows 10 will be installed on and prepare this drive for installation. To do this, select your hard drive and click “Format”. The formatting function will erase all data from the disk. Then click “Create”.
- At this stage, you set the number of GB for your system and set the necessary markup for its deployment. If you select less than the maximum GB, the drive will be divided into multiple parts. One of these parts (or a whole disk) can be implemented for OS installation. After choosing the number of GB, click “Apply”.
- Then click “OK” that the OS has created a system subkey to save its initial settings.
- After creating the “System” and “Main” section, select “Main” and click “Next”.
- Done. The installation process has begun. The installation time of Windows 10 directly depends on the speed of reading the flash drive and the speed of writing to the hard drive or SSD. On average, if you install an operating system from a USB 3.0 flash drive to an SSD drive via a USB 3.0 port, the installation time will take about 10 minutes. If it works via USB 2.0 and the distribution is deployed to an old hard drive, it can take up to an hour.


Typical Windows 10 installation
You can install Windows 10 on an SSD or hard drive directly from a running OS of the same family. If everything is done correctly, and this OS does not crash, then you can install the distribution kit even on the disk from which your Windows is running now. There will be no mistakes.
The only difference is that a Windows.old folder will be created, which will contain data for restoring the previous operating system.
If this method suits you, then the installation proceeds according to a similar principle:
- Connect the USB flash drive with the distribution kit to your computer and run “Setup.exe”.

- After checking for updates, checking your PC, and accepting the license agreement, Windows 10 Setup will start the installation process.
- Wait for updates to check.
- Then close everything on your PC and click Install.
- Also, you can click on the “Change the components selected for saving” button and choose whether to save or not save your data.
- The installation proceeds in the same way as described for a clean installation of Windows 10. You need to select the disk on which the OS will be recorded. If this is the same drive from which Windows is currently running, you do not need to format it. Just select the drive and click “Next”. The installation wizard will notify you that a Windows.old folder will be created with the files and folders of the current OS. Click “OK”.

- As soon as you decide on the drive, the installation of the OS on the PC will begin. At some point, the PC will restart and the installation will continue outside of Windows 10. Everything will complete in the same way as if you installed the system from scratch.


Additional ways to install Windows 10
There are several other ways to install Windows. All of them are related to the fact that Windows 10 is already installed on your PC and you want to reinstall it.

For these purposes, there are several functions from the recovery section (Win + I – Update and Security):
- Reset the PC to its original state – rollback to the initial settings of the computer if it fails. In this case, the loading of the primary parameters will be pulled up from the recovery environment. If the PC fails to do this, you can connect a USB flash drive with Windows 10 boot files so that the PC can do a recovery via a flash drive.


- Revert to previous version – the option to install the previous version of Windows 10 from the Windows.old folder or alternative backup folders that the OS created. A good solution in terms of if the previous version worked well and the new one works with a lot of bugs.
- The “Windows Security” section in the defender, the “New Start” option is the same as launching the installer from a USB flash drive in Windows 10 itself, only without bootable media. If an option is available, you can work with it.


The disadvantage of all methods of restoring or installing the operating system is that such a process does not give a 100% guarantee of installing Windows. Since the system is being reinstalled due to unstable operation, this could affect these functions as well.
In the end, often, instead of a “successful rollback”, you get a return to this state, a wasted time and a “Problem when returning a PC to its original state” window.

Also, these methods do not allow you to change the type of system. If you need to change “Home” to “Pro” – do a clean install.
Problems installing Windows 10
Sometimes there may be problems before starting the installation or during the process. In this section, we will analyze the errors during the installation of Windows 10 that users most often encounter.
The selected disk contains an MBR partition table

A common problem that is solved by converting MBR to GPT partitions when installing Windows 10. The bottom line is that now for hard drives and their interaction with a modern OS, you need GPT partitioning. An outdated MBR is not suitable, so it needs to be converted. In this case, all data on the disk will be deleted:
- In the local disk selection window, press Shift + F10. Enter the command “diskpart” to launch a special program for working with disk partitioning.

- Run the “List Disk” command which will show all active disks on the PC.

- Select the disk with the MBR partition and run the “clean” command.
- Then enter the “convert GPT” command followed by the “exit” command.


When everything goes well, you can use the “mark up area” or partition the drive through the disk setup and start installing Windows 10 on a GPT partition.
Could not create new or find existing section

An error during the installation of Windows 10 manifests itself in the event that the system has nowhere to create system files or there are partitions on the only hard disk that you created manually. The solution to the problem is quite simple:
- Delete the main partition where you plan to install the OS.

- If there are several partitions, and the data on them is not valuable, delete them all.
- Allocate unallocated space, create the desired partition (or several partitions) and continue installation on one of them.
- If it doesn’t work, just restart your computer and try again to install the OS of the partition you just created.

Installing Windows 10 – error codes
If the installation of Windows 10 is interrupted and an error appears with a specific code, try to solve it using the following methods:
0x8007025d – problem with installation files, reading or writing them.

You need to check the availability of space on the hard disk, whether the hard disk is working properly, whether the OS image and the flash drive itself are working correctly.
You can also do the:
- run the USB flash drive according to the instructions for a clean installation if this condition is not met;
- disconnect all unnecessary USB devices from the PC before installation;
- use a different flash drive with a distribution kit or a different image;
- disconnect the Ethernet cable during the OS deployment period.
0x80070570 — Indicates that there may be installation problems due to hard disk failure or RAM failure
-
- Disconnect the PC and remove the RAM sticks. Wipe dust off them and ports. A regular eraser works well for this, with which you erase a pencil. Also, you can swap the bars and put them in free slots. You can check the RAM using MemTest86 +. Write the utility to a USB flash drive and run it through the Boot-menu. Press “1” to start scanning.

- If there are problems with the image or USB flash drive, reinstall the bootable USB flash drive or change the USB flash drive.
- You can check the hard disk for errors using the Viktoria program. It can be downloaded and installed on a USB flash drive, then run under boot-menu. If there are bad ones, they can be eliminated by the program itself, if there are bad sectors, everything leads to the fact that the disk is crumbling and needs to be replaced.

- Disconnect the PC and remove the RAM sticks. Wipe dust off them and ports. A regular eraser works well for this, with which you erase a pencil. Also, you can swap the bars and put them in free slots. You can check the RAM using MemTest86 +. Write the utility to a USB flash drive and run it through the Boot-menu. Press “1” to start scanning.


0xc0000005 – the error appears at the very beginning, and it seems that the installation of Windows 10 is frozen.
It manifests itself most often if the computer already has one Windows of the previous version installed on the second hard disk, for example Windows 7. To solve, just physically disconnect the second disk with the operating system during installation.
0x80300001 – ошибка проявляется в случае, если на диск с разметкой MBR устанавливается Windows 10 разрядностью x64.
You can fix it by converting MBR to GPT. If this does not fix the problem, you should start compatibility mode in UEFI:
-
- Open the settings called “BIOS Features”.

- Then select “Windows 10 Features” or Windows 8.

- Next click on “Boot Mode Selection -” UEFI Only “.

- Do a similar operation for the “Storage Boot Option Control”.

- Click F10, click “Yes” and repeat the installation process anew.
- Open the settings called “BIOS Features”.


0x80300024 is a problem with hard drives.
You should either manually format the disk on which you are installing or disconnect the drives not used for recording, if there are several of them. This is implemented through weaning drives in UEFI or physically disconnecting them in the system unit. Additionally, it is worth checking if the AHCI mode is enabled. It must be active. If it does not help, check the disk or try to install the OS on a different media.

0xc1900101 – the error often occurs when installing the OS from the update center to Windows 10.
The easiest way to fix the error is to run a clean boot of the Windows. Also, you should check if there is enough space for the installation. If there are many drives, they should be deactivated.

Installing Windows 10, error code 0x8007000d – manifested due to the inability to read or damage the installation files of the operating system
Try putting a different image on a USB flash drive, replace the USB flash drive and also make sure that the USB port you are using is working if you are installing Windows 10 on a laptop.
Required driver not found
If you see the error “no drivers found when installing Windows 10” when installing the OS, then you are doing something wrong.
To avoid the error, follow these steps:
- Connect the USB stick with the distribution to USB 2.0 and start the installation.
- Write down the installation files with any other program mentioned in the first section of this article.
- Please use a different USB drive.
- Re-download the installation file and write to the media.
If you’re trying to deploy an OS on a PC with older hardware, USB 2.0 can play a key role in a successful Windows 10 installation.
Windows 10 installation failed – this can happen when the computer is quite old and cannot install the OS via USB 3.0 without proper help (drivers). Also, the error appears if there was an attempt to install the OS from a DVD-R that is damaged or poorly readable by the drive.
Final stage of installation
After installing Windows 10, the window with the primary settings is pulled up. Go through all the steps to complete the settings:
- Select the country in which you are staying (this is necessary in order to correctly define the interface at least).
- Choose a keyboard layout too.
- You can choose several language packs for the keyboard.
- The installation of Windows 10 updates will start automatically. Provided that the computer is connected to the Internet. If you do not want to install updates, then at this stage it is better to disconnect the router or Ethernet connection from the PC.
- Wait while the system installs the latest updates. Do not turn off your PC to avoid compromising system stability.
- Wait until the end of the update procedure.
- After that, Windows 10 will report the success of the update installation and you will find yourself on the settings screen.
- At this point, select “Configure for personal use.”
- Then you need to sign in to your Microsoft email account or create one. If you don’t want to pull up the profile, you can create a local account with administrative rights. Later, you can authorize the Microsft account on the local profile. To create a local profile with admin rights, click “Offline account”.
- Click on “Limited Features”.
- Give a “Name” to the account. Some programs may not install correctly or work if the name is not in English. Therefore, it is recommended to work with a profile linked under an English name.
- Then come up with a quality password. If you do not use a password, then access to the desktop will be provided unimpeded after pressing the Power button to turn on the PC.
- The telemetry stage is very important. Review each item and decide if you want to leave it on or deactivate it.
- After pressing the “Accept” button, wait a couple of minutes.
- Done. The desktop will boot with only one basket and a control panel.


Once the installation is complete, you can start configuring Windows.
Windows 10 configuration settings
The Windows 10 operating system has a lot of settings that will be needed in certain circumstances of using Windows. But first you need to go through the main ones, which will come in handy in any case.
Account
There are two types of account that are used in Windows:
- Local is an account that is not tied to Microsoft services. It is limited by the OS itself in many ways, and it is best used if security and interaction with services and the Microsoft store are not critical during operation.
- Microsoft Profile – Provides a complete set of features for interacting with the OS. The downside of working through a Microsoft account is the multiple data provided to the company about the user. Most of this data can be turned off, though.
Setting up a profile, setting passwords and transferring from local to Microsoft profile and vice versa is done in one place: “Profile” – “Accounts” – “Your data”.

For example, to change your account to a local one, you should click on “Sign in with a local account instead.”
The password can be set or changed in the Login Options section. In addition to the password, there are other ways for further authorization.
A pin code is convenient for a PC. You can configure or change it without leaving the “Parameters” interface.

Telemetry
Microsoft uses a variety of options to collect information. You can control those that do not affect the security of the system and, if unnecessary, disable:
- Location
If you use a laptop or tablet on Windows 10 and often travel with it, then it makes sense to leave for some applications and the OS itself to access your location.
Applications such as maps, device search programs, weather data will provide relevant information for you. If you work on a stationary PC, you can simply disable geotagging, in most cases it is not needed.
To disable, go to “Options” – “Privacy” – “Location” – “Edit” – “Off”. Below you can pull up programs that can be provided with access to your geodata.

- Synchronization of data.
When you work with the OS through a Microsoft account, there are many options that need to be synchronized with the account. At the same time, data is stored not only on a PC, but also on Microsoft servers.
If you do not need synchronization, you can turn it off: Win + I – Accounts – “Synchronize your settings” – completely disable “Synchronization settings” or selectively for each item.
Additionally, you can disable your Microsoft account and go to local. This will de facto deactivate synchronization, but will deprive you of many different aspects, including access to the Microsoft Store, some security settings, and working with the cloud.

- Cortana – voice assistant
To enable Cortana: go to “Settings” – “Time and Language” – in the “Country or Region” line, select the United States.

It should be remembered that the voice assistant has its own telemetry parameters, which are adjusted independently of the others in the “Coratana Search setting” section.

- The lock screen is a space that can be seen not only by you, but also by other people in the vicinity.
Если вы не хотите, чтобы экран блокировки показывал лишнюю и личную информацию, нужно его изначально настроить: зайдите в «Параметры» – «Система» – «Уведомления и действия».
In the section, you can turn off everything that you do not want to see on the lock screen. If you work with Cortana, you can prevent the voice assistant from working when your PC is locked.

- Advertising identifier – used by the system to target advertisements based on interests for the user.
Naturally, this is a common practice among large corporations, and if you want to turn off the collection of information and the recommended, then you can do it simply: “Options” – “Privacy” – “General” – “Turn off”.

Installing drivers for Windows 10
Installing drivers after installing Windows 10 is done automatically, along with updates. The advantage is that there is always the right driver in the Microsoft databases for modern hardware.
But it is not always possible to install the correct device driver automatically. In this case, you need to refer to another database. For example, to the official website of the manufacturer of a PC, laptop or its component.
It is important to work and download drivers only from the manufacturers’ official websites. Otherwise, you can install the necessary driver, but in the bargain, pick up malware on the newly installed Windows 10.
It is not recommended to download software and drivers for the device from unverified sources!
Required drivers for Windows 10
- Network;
- CPU + Integrated Graphics;
- Controllers;
- Audio;
- Video adapters.
The OS finds all the necessary drivers on its own, and for video cards, they often use programs from the supplier in order to constantly keep abreast of the latest versions.
For NVIDIA, the GeForce Experience program is used. For AMD, it is recommended to go to the official website and download the driver from there.
You can see what drivers are required for installation in the device manager.

If the driver is not installed, an exclamation mark will be displayed next to the device icon, or it will be located in the “unknown device” section. Device Manager opens by right-clicking on Start and selecting from the context list by name.
Windows 10 security
There are three main areas of Windows 10 security to follow and tweak right away:
- Login password – protects your data from prying eyes when the computer is locked (Win + L);
- Restore point – protects the system from damage, as it saves a backup copy of the working OS, to which you can “roll back”. If you give an analogy, then this is a kind of preservation, to which you can return if “something went wrong” in the system.
- Network security + activity on the PC – regulated by Windows Defender or an alternative antivirus, if you install one on the system.
Setting a Windows 10 login password
If you linked your Microsoft account, then you should have the default password. It can and should be made complex to improve security. But in order not to constantly enter it in the unlock field, use the pin code. You can configure it like this:
- Open Options – Accounts – Login Options.

- Select a Pin code and set it.

- Now, in the blocking window, you can choose whether to enter using a pin code or password.


There are also other identification methods that are best used on laptops or laptops.
Recovery point
You can configure a restore point so that it is done automatically, or you can remember to do it manually. The first option is preferable and is configured like this:
- In the Start search bar, type “create a restore point”.
- Select your local disk (system) and click Configure.

- Click “Enable System Protection” and select the percentage of disk space that can be used by the system for this function.

- If you need to restore the system, click “Restore” here. The OS will pull up the last recommended restore point.

- But you can choose another point.


Antivirus
If you adhere to the canons of safe surfing the Internet, use only white programs in your work, do not go to phishing pages from mailing lists, and so on – leave Windows Defender as the main one.
Otherwise, it is recommended to adopt one of the paid antiviruses, which will provide complete protection against network attacks and prevent attempts of malicious activity on the PC.

Here are the top five AV-Test home antiviruses:
- AhnLab V3 Internet Security 9.0;
- Avast Free AntiVirus 20.8;
- AVG Internet Security 20.8;
- Avira Antivirus Pro 15.0;
- Bitdefender Internet Security 25.0.
Based on the latest report for October 2020: Eset ranks 8 in the top, Kaspersky Anti-Virus – 12, and Windows Defender – 15.
Our recommendation is to use the paid version of Malwarebytes antivirus. There will be no problem. For some reason, it was not included in the rating, although it detects many more threats.
Tips for caring for Windows 10
So that the installation of Windows 10 from a USB flash drive does not become a habit, you should take good care of the operating system and from time to time rake the data stream that passes through the computer. Unnecessary – delete, necessary – sort. For this, various processes are used on the PC.
Defragmentation Windows 10
If fragmentation is the removal of all information from the media, then defragmentation is the search and collection of all the divided parts of a file on disk into one place. The procedure allows the hard disk to work more efficiently. It can be done manually, or you can schedule it to be repeated at least once a month:
- To start defragmentation, open Explorer, right-click on the disk and select Properties. Then, go to “Service” and click “Optimize”.

- Select the drive and click “Optimize”.

- To configure the execution according to the schedule, click “Change parameters”, select the frequency “monthly” and click “OK”.


Scanning System
From time to time, you need to check all files and folders on your computer for malware or the consequences of its operation. Antiviruses or the built-in Windows Defender will help with this:
- In the search box, enter “Windows Security” and select the found environment.

- Go to the “Virus and threat protection” section and click “Scan options”.
- Click “Full Scan”.
- And below the button “Scan now”.


Get rid of all detected viruses and potentially unwanted software immediately or work with them through the sandbox.
Browser cache
Cache data can take up a lot of disk space. Therefore, they can be cleaned up once a month. This is how it is done for the Google Chrome browser:
- Press the keyboard shortcut Ctrl + H.
- Then click “Clear History”.
- Select a period and “Pictures and other files saved in the cache”.

- Click “Delete data”.

Cleaning the Windows 10 Registry
There are programs that allow you to optimize your PC in a few mouse clicks. One of these programs is Auslogics Boostspeed, which allows you to:
- Clear cache and cookies in any browsers at once;
- Delete junk entries from the operating system registry;
- Erase temporary files;
- Fix various bugs.

The main thing is to download the utility from the official site and use it periodically to optimize and clean it from garbage.
All in all, installing Windows 10 today is a pretty straightforward process
The Windows 10 installation process does not require any special knowledge or computer skills. To create bootable media, you need a USB flash drive and Internet access.
To install, you need to find out how to enter the UEFI or boot menu and load a USB flash drive from it. And before starting the installation, specify the correct drive.
After installing Windows 10 on your PC, take care of the stable operation of all components in the system and adjust the security settings. For long-term use, remember to optimize your operating system so that you can use it for many years.